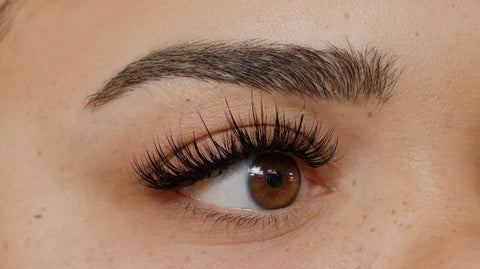
If you're on the hunt for the best method to maintain those lovely lash extensions, then you've stumbled upon the right guide. Whether you've searched "lashes near me" or are curious about the "lashify" trend, understanding how to clean and care for your extensions is pivotal. Let's dispel some myths: Cleaning your eyelashes isn't a Herculean task. It's neither daunting nor uncomfortable. All it requires is a pinch of dedication each evening before you drift into your dreams. With the right lash cleanser in your beauty arsenal and by familiarizing yourself with how to use eyelash cleanser, ensuring your extensions stay pristine becomes an effortless routine. Before you know it, it will be one less thing on your nighttime checklist!
Table of Contents:[hide]
Use a quality cleanser.
Selecting the right lash cleanser is paramount. It's essential to choose a formula that's gentle on your eyes, ensuring no discomfort or irritation. It's advisable to invest in a cleanser from a reputable lash brand, guaranteeing you're opting for the best fit for your extensions. Remember, cleansers differ; some are designed specifically for natural eyelashes, while others shine when paired with lash extensions. If you're delving into the nitty-gritty, pondering questions like "how to use lash shampoo" or "how to use eyelash cleanser," rest assured that most renowned brands offer clear instructions to guide you to pristine lashes.

Don't forget to remove your eye makeup first.
With your lash cleanser in hand, it's time to delve into its proper application. A pivotal starting point: always ensure you've thoroughly removed your eye makeup. This precautionary step is indispensable for the longevity of your lash extensions. Clearing away makeup residues before employing your lash shampoo or cleanser safeguards your extensions from potential damage. Neglecting this step might lead to makeup smearing into your eyes during the cleansing process. And let's face it: dealing with a sting or smear while learning how to use eyelash cleanser isn't on anyone's wishlist!
Choose the right water temperature.
When prepping for the cleansing process, it's crucial to select the right water temperature. Aim for lukewarm water, steering clear of the temptation to use hot. Hot water can be counterproductive, potentially leading to irritation and parched lashes. To strike the perfect balance and ensure a comfortable experience, consider testing the water's warmth with a cotton pad prior to introducing it to your eyelashes. This ensures the ideal temperature, especially when you're figuring out how to use lash shampoo or any eyelash cleanser, guaranteeing the best results while prioritizing comfort.
Use only a pea-sized amount of cleanser.
Harnessing the full potential of your lash cleanser begins with understanding the right quantity to use. As a general rule of thumb, starting with a pea-sized dollop is wise. Overloading your lashes with too much product might pave the way for irritation. So, when contemplating how to use lash cleanser or lash shampoo effectively, it's always better to be conservative in your initial approach. Remember, it's easier to add a tad more if necessary than to backtrack from an excessive amount. The goal is gentle yet thorough eyelash care.
Apply the cleanser in an even layer all across the lash line.
It's go-time for that eyelash pampering! Kick things off with a pristine lash brush or wand. Using this tool, spread the lash cleanser evenly along the lash line. Visualize it as an art, painting your lashes with gentle back and forth strokes. This ensures the cleanser envelops each and every eyelash, offering thorough care. If at any point the process feels uneasy or you're wondering how to use eyelash cleanser more comfortably, remember, there's no rush. It's absolutely fine to pause and resume. Perfecting this routine might take a couple of tries, so relax and give yourself the grace to learn and adapt. After all, the journey to flawless lash extensions is a gentle curve, not a straight line.
Let the cleanser sit for 10-15 seconds before removing it.
Patience is your best ally during this lash-cleansing ritual. Allow the cleanser ample time to deeply penetrate and effectively cleanse the lashes. But a word of caution when it comes to the rinsing stage: steer clear of face cloths, cotton balls, or paper towels. The fibers in these materials can easily adhere to the lash extensions, posing a risk of unintentional removal. So, when understanding how to use lash shampoo or cleanser, it's not just about application but also ensuring safe removal without compromising those luscious lash extensions.

Work gently. You should never rub or scrub when cleansing your lashes.
Though the beauty world often tempts us with sophisticated tools tailored for lash care, simplicity often reigns supreme. The golden rule when tending to your lashes is to avoid any vigorous rubbing or scrubbing—put away those cotton swabs, washcloths, and towels. When deliberating on how to use eyelash cleanser most effectively, trust in the gentleness of your fingers or a dedicated lash wand. Pair these with some lukewarm water, and you're well on your way. The key is a soft touch; after all, your eyelashes appreciate a gentle hand just as much as you do!
It's important to maintain them in order to get the best results from your extensions.
Lash cleansers are a game-changer in your beauty routine. Learning how to use a lash cleanser right can make all the difference. By dedicating a few minutes to cleanse and condition using products like lash shampoo, you're giving your eyelash extensions the best chance to shine and last longer. It's about enhancing those natural "eyelashes" to "red-carpet-ready eyelashes."
In a nutshell: Clean and cared-for lashes are the secret to longevity and that mesmerizing flutter. If you ever paused to ask, "how to use eyelash cleanser?" or "how to clean lash extensions?", this guide's got your back. Remember, dirty lashes aren't just a beauty faux pas—they can also be problematic.
So, whether you're new to the world of lash extensions or a seasoned pro, always prioritize lash care. Regular and meticulous cleansing not only ensures they look fabulous but also maximizes their lifespan. Cheers to consistently stunning, lasting lashes!
Did this post help you? Let us know on instagram!


